What to Look For: DIY Checks and Inspections

There are several quick checks that you can do to determine where you may need more insulation and air sealing in your home. Every home is different, so it's important to check which projects may be needed in your own home.
Want a more thorough evaluation? You might also consider hiring a home energy professional to perform a comprehensive energy audit to pinpoint specific solutions for your home and identify potential safety issues.
Materials and Equipment
- Boards to walk on, if needed
- Tape measure
- Flashlight/headlight
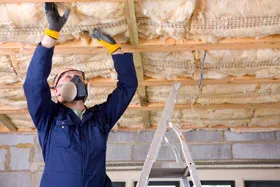
- Hard hat or cap to protect head from sharp roofing nails
- Safety glasses, gloves and dust mask/protective face mask
Tips and Safety Considerations

Some attics have vermiculite insulation, which may contain asbestos. Vermiculite is a lightweight, pea-size, flaky gray mineral. Do not disturb vermiculite insulation unless you have had it tested by an approved lab to be sure that it does not contain asbestos. Contact your local health department for the name of an approved lab.
- Watch out for nails pointing up through the ceiling or down from roof deck.
- Walk on joists or truss chords, not exposed ceiling drywall or insulation, to avoid falling through the ceiling.

Method 1: Quick Check of Insulation Levels
Looking across your attic, if the insulation is level with or below the attic floor joists, you probably need to add more insulation.
 Assumes R-3/inch
- If you cannot see any of the floor joists because the insulation is well above them, you probably have enough, and adding more insulation may not be cost-effective.
- It is important that the insulation be evenly distributed with no low spots; sometimes there is enough insulation in the middle of the attic and very little along the eaves.

Method 2: Measuring Insulation Levels
- Either read the R-value printed on the batts of your existing insulation or use a measuring tape to measure the depth of the insulation (inches).
- Next, use the table below to calculate the R-value of your insulation by multiplying the measured depth with the number provided below. You will need to determine the type of insulation first using the general product descriptions. The number you end up with indicates the R-value of your existing insulation. If it's less than the recommended levels provided below, then you should consider adding more insulation to your attic.
| What you see: | What it probably is | Depth (inches) | Total R-value | |
|---|---|---|---|---|
| Loose fibers | light-weight yellow, pink, or white | fiberglass | _____ | =2.5 x depth |
| dense gray or near white, may have black specs | rock wool | _____ | =2.8 x depth | |
| small gray flat pieces or fibers (from newsprint) | cellulose | _____ | =3.7 x depth | |
| Granules | light-weight | vermiculite or perlite | _____ | =2.7 x depth |
| Batts | light-weight yellow, pink, or white | fiberglass | _____ | =3.2 x depth |
Recommended Levels of Insulation
Once you have determined the R-value of the insulation in your attic, use the table and climate map below to determine which level of insulation is best for your home.

| Zone | Add the following insulation levels to your attic | Floor | |
|---|---|---|---|
| For uninsulated attics | For attics with existing 3−4 inches of insulation | For uninsulated basements or crawlspaces | |
| 1 | R30 to R49 | R25 to R30 | R13 |
| 2 | R30 to R60 | R25 to R38 | R13 to R19 |
| 3 | R30 to R60 | R25 to R38 | R19 to R25h |
| 4 | R38 to R60 | R38 | R25 to R30 |
| 5 to 8 | R49 to R60 | R38 to R49 | R25 to R30 |
To calculate a tailored insulation level for your particular location and home type, use the DOE Zip-Code Insulation Program.

Check if your exterior walls have insulation by using an electrical outlet:
Turn off the power to the outlet before beginning this check. Also it is recommended to use a volt meter or voltage tester to confirm that there is no power at the socket before beginning work.
- Remove the outlet cover and shine a flashlight into the crack around the outlet box. You should be able to see if there is insulation in the wall and possibly how thick it is.
- Pull out a small amount of insulation if needed to help determine the type of insulation.
- Check outlets on all floors, as well as old and new parts of your home. Just because you find insulation in one wall doesn't mean that it's everywhere in your home.
It is recommended that exterior walls have insulation and be fully filled.
Method 1: Visual Inspection for Gaps and Cracks
Start by conducting a visual air leakage inspection on your home to look for cracks and gaps at the common leak sites shown in the diagram below (list of common leak points). Take note of where you see gaps so you can come back and seal them later. The home envelope (shown in red in the diagram below) should be free of gaps and cracks and should be well sealed.

Method 2: DIY Light Test for Air Leakage
Find leaks by conducting a simple DIY light test.
- Shine a flashlight at night over all potential gaps while a partner observes the house from outside. Where you see light shine through, that spot has an air leak.
- While lights are on in the home, observe from the attic, crawlspace or basement any light from the interior of the house shining through gaps and cracks. Where you see light shine through, that spot has an air leak.
- For windows and doors, look to see if light shines through the edges where it should be sealed shut. Where you see light shine through, there is an air leak.
Method 3: DIY Paper Test for Window/Door Air Leakage
Find leaks in your windows and doors using the paper test. Simply shut a door or window on a piece of paper. If you can pull the paper out without tearing it, you have a leak and you are losing energy.
Method 4: DIY Smoke Test for Air Leakage

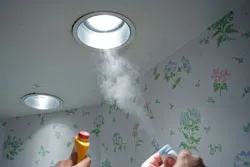
Find hidden air leaks by conducting a simple DIY smoke test. This is done by turning on all fans and vents and using incense smoke, talcum powder or baby power to find potential leak sites. Here's how:
- Turn off all combustion appliances such as gas burning furnaces and water heaters on a cool, very windy day.
- Shut all windows, exterior doors and fireplace flues.
- Turn on all exhaust fans that blow air outside, such as bathroom fans or stove vents, or use a large window fan to suck the air out of the rooms.
- Light an incense stick or dust the talcum powder into the air around the edges of common leak sites. Wherever the smoke wavers, or is sucked out of or blown into the room, there's a leak. You can also use a damp hand to locate leaks; any leaks will feel cool to your hand.
Want a more thorough evaluation? Consider hiring a home energy professional to perform a comprehensive energy audit to find hidden air leaks, pinpoint specific solutions for your home and identify potential safety issues.


