Sealing Behind Window & Door Trim Project

Sealing trim is generally a moderate to difficult do-it-yourself (DIY) project, but the benefits can be substantial if you are sure of the problem and can address it accordingly. If you are doing a window replacement job, now is a great time to tackle this project too. The good news is that, even if you’re not comfortable taking on this project yourself, there are many qualified contractors who can help you get the work done.
Use the information below to determine if this project is a good fit for your home, what common problems it can help address, what the potential benefits are, what tools and materials you’ll need to complete the project if you choose to do it yourself, important safety considerations, step-by-step instructions for getting the job done, and when to seek professional assistance.
QUESTIONS TO CONSIDER
Common Signs & Symptoms
Some obvious signs and symptoms that your home has air leaks and can benefit from air sealing are:
- Drafts around your closed window or door
- Visible gaps around the window or door trim
- Noticeable pests and dust entering through gaps or holes in or around the window or door
- Odors from the outside entering the home
- Peeling paint around the window or door frame

What to Look For
Sometimes it is not obvious if a window or door is leaking around the trim. There are several quick and easy ways to locate leaks to see if your home could benefit from this project.
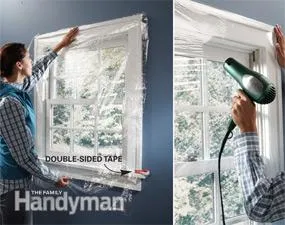
- Perform a paper test: close the window on a piece of paper. If it easily moves back and forth this means your window could be tighter. This can be accomplished by adding thicker weather stripping.
- Light an incense stick and hold it next to the seams or sash of the window. Watch the smoke to see if the smoke is pushed in a particular direction. If you see the smoke pushed one way or another, you most likely have a leak.
Click the picture on the left for step-by-step instructions on performing any one of these tests.
Check for proper air sealing behind window or door trim. To do this, take the following steps to remove the existing interior trim:
Lead Paint
Homeowners renovating or repairing their own homes can easily create dangerous lead dust. If your home was built prior to 1978, or your work requires disturbing paint, first visit EPA’s Lead Renovation, Repair, and Painting Program resources.
Cut the paint where the trim and the wall and jamb meet to prevent chipping or tearing. Several passes may be necessary for heavy paint buildup.
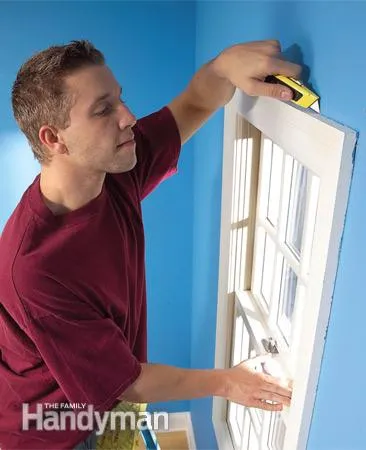 Cutting through paint on trim
Slip a putty knife under the trim and lift it so that you are able to insert a flat pry bar. Using the pry bar, pry away the trim. Move the pry bar along the length of the piece lifting the trim off gradually.
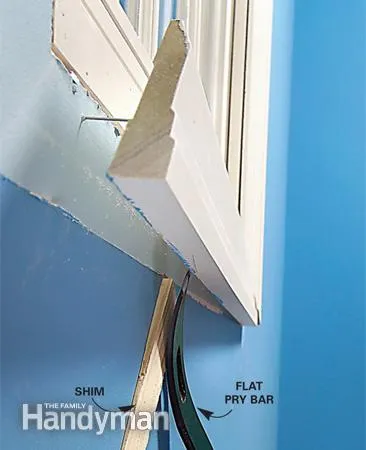 Removing trim
At mitered corners, pry off both mitered pieces together to prevent any nails from splitting the mitered ends. Once off, then you can pull them apart. When removing nails from the trim, be careful to not damage the face of the trim.
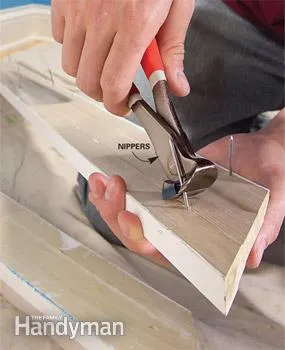 Removing nails from trim
- Once you have removed one piece, examine the space between the wall framing and the jamb. If the drywall is covering the space, trim it with a utility knife.
- The lack of insulation or the presence of only a small amount of sealant sealing the gap between the wall framing and the jamb indicates poor sealing, and most likely indicates that all your windows/doors are poorly sealed and are good candidates for this project.
Alternatively, finding a home energy professional to perform this job may be a better solution as they have the tools to easily pinpoint the problems and complete the project for you.
Savings in Energy and Money
Leaks windows and doors can lead to uncomfortable drafts and energy losses. While these projects may have less impact on energy use than those in the attic and basement, they tend to be the more accessible areas and are perfect for a do-it-yourself project. Even if your windows are otherwise airtight, the payoff for sealing behind window or door trim can still be substantial.
If you enjoy tackling a more challenging home improvement project, sealing behind window and door trim may be a good DIY project for you. Otherwise, consider finding a contractor to complete the project for you.
| Doing the Project Yourself | Hiring a Contractor | |||
|---|---|---|---|---|
| Ease of Project | Time (days) | Costs | Time (days) | Costs |
| Moderate − Difficult | 1−2 | $$ | 1 | $$$ |
Did You Know?
Depending on your income level you may be eligible for financial assistance for air sealing and insulating through your state’s Weatherization Assistance Program (WAP).
For more information, visit the following site and select your state of residence: Weatherization & Intergovernmental Program Map.
Key: $ = <$100, $$$$$ = >$2,000
EPA’s ENERGY STAR program provides great DIY resources to help you get the job done. However, if you find any of the following conditions, it is recommended that you hire a professional to correct these problems before proceeding:
- If your windows have more complicated trim, such as having sills, quarter inch rounds installed with the framing, and/or decorative accents, consider using a professional.
- If your home was built before 1978, you may need a professional to safely handle hazardous lead paint chips.
Materials and Equipment
Safety Equipment if working with fiberglass)
- Dust mask
- Gloves
- Eye protection
Materials
- Sealant
- Non-expanding foam sealant spray made for windows and doors, and/or
- Caulk (including caulk backer rod, and caulk gun), and/or
- Fiberglass
- Putty (match paint color)
- Spackle (for painted trim)
- Paint (for painted trim)
- Nails
Tools
- Hammer and nail punch
- Brad nail gun
- Nippers or Pliers
- Pry bar
- Putty knife
- Rags
- Utility knife
Tips and Safety Considerations
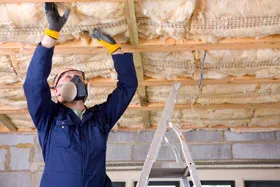
- Wear a dust mask, gloves, and eye protection if/ when working with fiberglass
Sealing behind window or door trim:
- Remove the existing interior trim. See the section above for detailed information.
- Pull out existing insulation from between the jamb and the wall framing.
- Install any of the following sealing options:
Non-expanding foam sealant spray: Used for larger gaps. Spray and let the foam harden. Trim off any excess foam with a knife.
 Sealing behind window trim with low or no expanding foam sealant
- Fiberglass insulation and/or backer rod: Used for larger gaps. Gently push fiberglass strips or backer rod, into the exposed gaps between the window or door jamb and the rough opening. Backer rod can works very well but do not force the rod into the space so the window or door frame is bent or deflected even a small amount. It can cause problems with the fit (opening or closing) of the window or door. Cut the rod to the desired length, and press it into the gap so that it’s slightly below the surrounding surfaces. When using fiberglass insulation, try to use pre-cut strips of fiberglass pipe wrap, as this minimizes dust accumulation from the need to rip and cut the fiberglass insulation batts. You may also follow up with foam or caulk to seal the gap.
- Caulk: For gaps a quarter inch or less. Clean out the cracks you want to caulk. Follow the package directions to open the caulk tube. You may need to puncture an inner gasket with a long nail or stiff wire to open the tube. Smooth the caulk with a finger or tool after installing to help ensure a good seal.
- Reinstall each piece of trim in its original position and tack each one up with only two nails.
- When all the pieces are in place, check their fit. With only a couple of nails in each piece, you can make small adjustments by holding a block against the trim and tapping it with a hammer. Then add more nails. Sink each nail until the nail-head is 1/8” from the wood. At this point, use your nail punch to countersink the nail 1/8” below the surface of the trim.
- If your trim has a clear finish, fill the nail holes with matching-colored putty.
- If your trim is painted, fill the holes with spackle and repaint.
Have an older home?
Older homes often have double-hung windows with cavities hidden in the wall for counter weights. For these type of windows, do the following:
- Access these cavities by removing the side trim or by going through access ports along the sides of the window. If you have old windows with working pulleys, the pulley holes can be air sealed but kept usable with plastic caps called pulley seals.
- If the window is replaced, the weight should be removed and the cavities filled with insulation and sealed.
Looking for your next Wall/Windows/Doors sealing project? Try one of these:
Looking for your next Wall/Windows/Doors sealing project? Try one of these: